Search This Blog

Sunday, September 23, 2012

Butter

Home made butter is easy.  I used 2 cups of heavy whipping cream and ended up with 1 cup of buttermilk and about 1 and 1/2 cups of butter.  I made unsalted butter so I can use it in my baking.
The key to making butter is to whip it.  Whip it good.
This is the whipped cream stage.  To make sweet whipped cream I add 2 Tbs powdered sugar and 1 tsp vanilla extract to my 2 cups of heavy whipping cream.  This is a great topping for desserts.  But we are not making whipped cream this time.  We are making butter.  Continue to whip it.
Continually whipping the heavy cream on high, past the whipped cream stage, and it starts to separate and look grainy.  Keep whipping.
Finally when it separates you are done.  The liquid part is buttermilk and the solid is butter.
Drain the whole mess through a strainer over a bowl.
Mash the butter down a bit to get all the buttermilk out.
This is buttermilk.  Keep it.
Fresh buttermilk has a more mild flavor than store bought.  It is best stored in the refrigerator for about a week.  I used it to make pancakes.  I also store things in empty ice cream containers.
Take the strained butter and put it in ice water.
Mash the butter with a wooden spoon into small chunks.
Strain it again to get all the cold water out.
Mash it into the strainer to get as much water out as you can.  Do not save the butter water, you can throw that out.
Put the butter onto wax paper.
Roll up butter into wax paper and store it in the refrigerator for about 2 weeks or in the freezer for a few months.
Fresh home-made butter.

Sunday, September 9, 2012

Pasta for Two

Spaghetti (or Pasgetti for the young at heart)

It is just J, Takashi, aka Wo-hoke-ah-show (Translation: The Stomach That Walks) and I. I have difficulty cooking for two. Growing up in a family of seven (being the oldest child, I am therefore the responsible one) cooking and shopping for a lot of people comes naturally.  It wasn't until a few months into our newly wedded life that the realization that the giant 5 lb block of bulk cheddar was not disappearing as fast as it did at my parents house, it then dawned on me that I no longer lived in a house full of people and J and I really could  not eat that much cheese. Thank you Mr. Peterson, for forcing me to learn the math skills to cut recipes down to 1/2 and 1/3 so that I can make a dinner that we do not have to eat every night for the rest of the week.  I was super excited when I found this recipe for pasta for two. I love making fresh pasta.  I don't think I have posted an example of my pasta making skills yet, so here I go.
 Pasta for Two.  Tonight I utilized it for  spaghetti.
3/4 cup all purpose flour
1 egg
Splash of olive oil
Pinch of salt
 Measure out 3/4 cup flour on a table top with a pinch of salt and make a well in the center of the flour.
 Add in that flour well one egg and a splash of extra virgin olive oil.
 Scramble the egg, olive oil, and slowly incorporate the flour from the inside of the well.
 When it is thick enough break and flour well and smush it all together into one lump.
 Get your hands wet with cold water and start kneading, incorporating the flour on the table.
 Knead the pasta dough for 5 - 10 min until smooth.  You may need more water.
 Wrap dough ball in plastic wrap and let it sit at room temperature for an hour, or refrigerate if you do not plan on using it immediately.  You can keep it in the refrigerator overnight or a few days if you need to.
 Roll out pasta dough.  It is easier if you roll it out first before running it through the pasta machine.
 My beloved husband got me this pasta machine attachment to my glorious green kitchen aid that my wonderful parents got for me.  I love it that my family supports my cooking obsession.  Run pasta through until it is long and thin.
 As my darling husband does not like eating one gargantuanly long noodle, cut the pasta sheet into sections.
 Run it through the spaghetti attachment.  I call this Spaghettifying.  If you do not have a pasta machine (you poor Dear), roll the pasta dough out as thin as you like and cut it into strips. Having used both methods, and since one of my goals in life is to serve the future Robot Overlords, I like the spaghetti machine better.
 Spaghettification.  Also when I make lasagna noodles I spaghettify the rest of the pasta to use for later.
At this point the noodles can be used immediately or stored in the refrigerator in a gallon zip lock bag for up to a month.
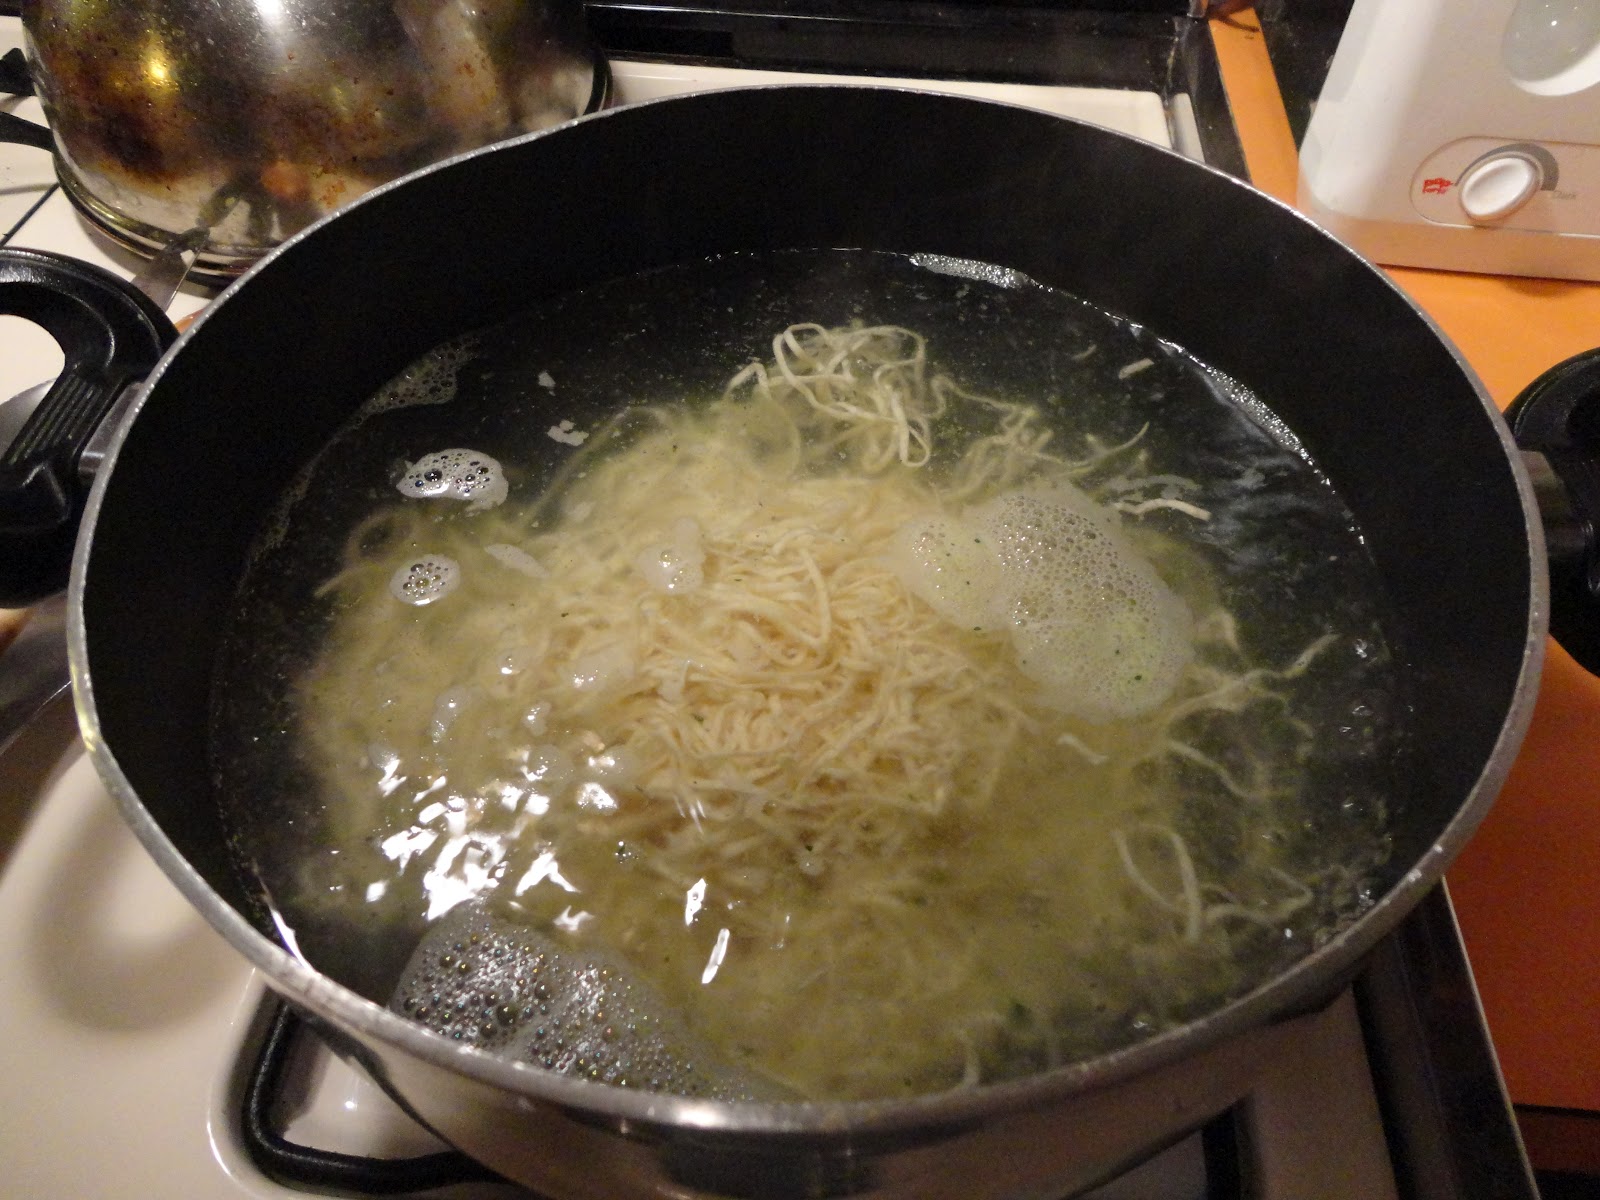
 Boil for three minutes.
 Ahhh! just like Mama used to make back in the olde country. Toss with green onions, tomatoes, garlic, and parmesan cheese.  I do love cheese, just not too much cheese.
For dessert we had caramel cake with whipped cream.

Sponge Cake:

3/4 cup butter, room temperature, softened, or melty.
3/4 cup sugar
3 eggs
2 tsp vanilla
1 and 1/2 cup self rising flour

Beat together butter and sugar, add eggs and vanilla, add flour and mix together.  Bake at 350 degrees for about 20 minutes.

Caramel:

Cook one 14 oz can of sweetened condensed milk in a crock pot, covered in water, on low for about 8 hours.  Refrigerate for 3+ hours or overnight.

Whipped Cream:

1 cup heavy whipping cream
1 tsp vanilla
1 Tbs powdered sugar
Whip it until it is cream and refrigerate.


Monday, September 3, 2012

Cream of Potato Soup with Bacon

Cream of Potato Soup with Bacon

This is a clam chowder recipe.  I had potatoes, bacon, and heavy cream on hand but no clams so I turned it into a cream of potato and bacon soup.  This is also a nice one pot recipe.

Into one large pot add:

1 ration of bacon cut into small-ish pieces and fried crispy.  Remove to drain and set aside.
Add 1 onion and a few sticks of celery finely chopped to the rendered bacon fat and saute for about 5 min.  Like Momma always says "Never let good bacon fat go to waste".
Chop garlic and add to the pot and saute for about 30 seconds.
Add 1/4 cup flour to cover the vegetables and cook for about a minute.
Gradually whisk in 2 cans of vegetable/beef/or chicken broth
Add 7 to 8 diced potatoes.  
Bring pot to a simmer and cook for an additional 15-20 minutes until the potatoes are soft.
Add 1 cup heavy cream and season to taste with salt and pepper.
Add back the crispy bacon and some parsley for garnish.
Enjoy.

Ricotta

I made Ricotta Cheese this week.  It is pronounced Re-Co-Ta with an Italian accent in three syllables and emphasis on the "T".  I am from Utah.  I have a Utah accent, for which my husband ridicules me relentlessly.  I pronounce it Rick-ada with two syllables and no discernible "T" because as a Utah native I replace all the "T"'s with "D"'s in words and run them together (ahhh regional colloquialisms).    
6 cups Whole Milk, not vitamin D milk, or 2% milk, but whole cream in milk.  It took some time but I finally found it at Sprouts, formerly known as Sunflower Market.
2 Tbs vinegar
1 tsp lemon juice.  I think they meant fresh squeezed lemon juice, but I used bottled lemon juice and it had the same effect.
A pinch of salt for taste.  The first batch I did not use any salt and it was a bit bland so I added some sea salt to the second batch and that helped it quite a bit.  A gallon of whole milk makes 2 and 1/2 batches of ricotta or about 3 to 4 cups.
 Heat milk to 180 degrees over medium heat, that is almost to a boil, but not boiling yet.  I used a candy thermometer to get the right temperature.  Remove milk from heat and add 2 Tbs vinegar, 1 tsp lemon juice, and a pinch of salt.
 The milk will begin to curdle instantly.  Let it sit for about 5 minutes.
 Drape a strainer with 3 layers of cheese cloth.
 Scoop out ricotta cheese curds with a slotted spoon into the cheese cloth, or just pour the whole pan in to strain it all at once.  I do not know what to do with the extra whey yet, so I just drained it down the sink.
 Fold up the sides of the cheese cloth and tie it onto a spoon (Note: Artfully fire hardened wooden spoon, so rustic) over a large bowl to let the whey drip out.  Let it sit for an hour or two as to completely drain.  Unwrap the ricotta and store it in an air tight sealed container in the refrigerator.  It is good for about a week.
 I made lasagna.
 Then I added the rest to some sausage, green onions, and pasta.
Delicious and easy to make at home rich ricotta cheese.  Enjoy.

Monday, August 20, 2012

French Macaroons

This is my first attempt at making French Macaroons.  I bought a book.  My friend Scarlet has spent the last two years perfecting her recipe.  Apparently they are easy to make but hard to perfect.

3/4 cup Almond Flour or Almond Meal.
1 cup Powdered Sugar or Confectioners sugar
Put this in a food processor and blend for 15+ seconds.  Sift into a separate container.  It needs to be a really fine powder.  Throw out (or eat) the larger almond-sugar pellets.

2 egg whites at room temperature.  Beat until they form soft peaks.
1/4 cup superfine sugar.
I guess this means regular sugar, but I bought ultra superfine sugar just in case.  The granules are smaller than regular sugar.  Add 1 Tbs at a time to egg whites and beat until stiff peaks form and the mixture is glossy.
Beat in 1/2 tsp vanilla or other flavoring or colors.

Fold in 1/3 of almond-sugar powder into egg whites.  Repeat 1/3, repeat 1/3 until all the almond-sugar is folded into the egg white mixture.  The dough is thick and pasty at this point.  Stuff it into a piping bag and pipe out 25 - 30+ small circles onto a parchment paper lined baking sheet.  Let the cookies sit for 30 min at room temperature to set. While waiting, heat oven to 325 degrees.  Bake on two baking sheet trays for 10 - 15 min.  Let cool for 10 min.

Vanilla Butter Cream Filling
1 stick butter, room temperature
1 cup powdered sugar
1 tsp vanilla

When cookies are cool completely, fill with buttercream and stick two of them together.  Makes about 16 cookies.

I made too much filling.  I need to only make half or a quarter next time.  I ate the rest.  I could not stop myself.  I love you sugar-butter.  They were not perfect, too crunchy and hollow on the inside and not nearly up to Scarlet's standards, but J and I loved them and ate them all in one sitting.  I am definitely going to try this one again. 


Civil War Ladies Fashion Show

This is the Place Heritage Park Ladies Fashion Show Aug 10 - 11, 2012.
My Mom took these pictures for me.  Thanks Mom.
At every Civil War event we do a Ladies Fashion show where we start in 1860s undwear:  a Chemise (or a long cotton slip with short sleeves that is off the shoulder) bloomers, stockings and shoes.  Then we build up the different layers from there.  I was the model this year because I finally got all of my underclothes period correct down to the shoes and stockings.  I was getting a lot of flack from wearing my oh so comfortable sneakers all the time.
Corset
This is my friend Amanda helping to tighten the corset and give the presentation.  Everything about 1860s Ladies Fashion was to accentuate a tiny waist.  An ideal waist size was 15" to 18" around.  Women starting wearing a corset at age 16.  I started wearing mine at 31.  You need someone to help you get into one of these.  Back then it was a Mother, Sister, Servant, Slave, or Mammy.  J helps me when no one else is available.  The term "Loose Woman" or "Loose Girl" came from a lady who wore her corset loose so she could get in and out of it quickly.  Also the phrase, "Tight laced" came from wearing a corset.  I learned that you must put your stockings and boots on before the corset because there is no bending over once it is on.
Hoop Skirt
Large at the bottom and large on top is our motto, all to focus on that tiny waist.  The corset also helps hold up the hoop skirt and petticoats.  Like today's fashions, the hoop skirt style came from France.  There were several types of hoop skirts, the one I have has 6 rings and is pretty flouncy with ruffles sewed in to mimic an extra petticoat that I do not need to sew.  Hoops were made from whale bone, wood, rope, wire, stiff fabric, cotton, or horse-hair.  Another option was a Crinoline which was a wire, leather, or rope cage without the fabric in between that also gave the nice bell shape under a skirt.  Crinolines are also lighter to wear than a full fabric hoop.
Petticoats
Petticoats give the dress a nice full look.  I had one petticoat and sewed another three for this event.  Ladies normally wore 3 to 7 petticoats under their dresses, over the hoop.  Southern Bells wore as many as 10-18 petticoats to make their dresses look really fluffy.  It was considered immodest to have the "bones" or ribbing of the hoop skirt show through your dress.  During the winter you wore more petticoats for warmth.
Undersleeves
Ladies only had 2-3 dresses which were washed occasionally to keep the colors from fading.  To prevent the dresses from getting sweat stains and dirt around the sleeves and neck they wore undersleeves and collars that would get dirty instead of the dress.  These were changed out and cleaned.  It is easier to clean a removable undersleeve than an entire shirt. 
Skirt
A full 10 yards of fabric for the skirt that my beloved husband painfully sewed for me.  He made my dress so I could go re-enacting with him: skirt, shirt, undersleeves, and chemise.  I bought the bloomers and made the petticoats.  He also bought my hoop, stockings, shoes, and lace collar.  He sewed all his own uniforms and did some of the leather work.  He cooks as well.  I am so lucky to have him.
Shirt
The shirts, or top of the dresses, also had large puffy sleeves with the hem line off the shoulder to make it look fuller on top, again to accentuate a narrow waist.  Notice, both Amanda and I wear white collars.  Almost every day outfit had a white collar and white sleeve cuffs.  At night the rules were different, but during the day it was long sleeves and dresses up to the neck for modesty and sun protection.  The shirt matches the colored flowers on the skirt, but clothing colors and patterns did not always match back then.  Clashing fabric patterns and colors were commonly used.  For a man a pair of pants, shirt, vest, and jacket all from different colored or patterned material was common.  This indicated that he was wealthy enough to afford more than one bolt of fabric.
Hat
And a bonnie new hat to top it off courtesy of  Mary Ann Barnard.   You know, the hat lady, or Milner, a person who makes hats.  She made this one special for me with green trim and peacock feathers which I requested.  Now I just need J to make me a new dress to go with it.
Now my Civil War outfit is complete and I look like a proper lady who is ready to go about town.